

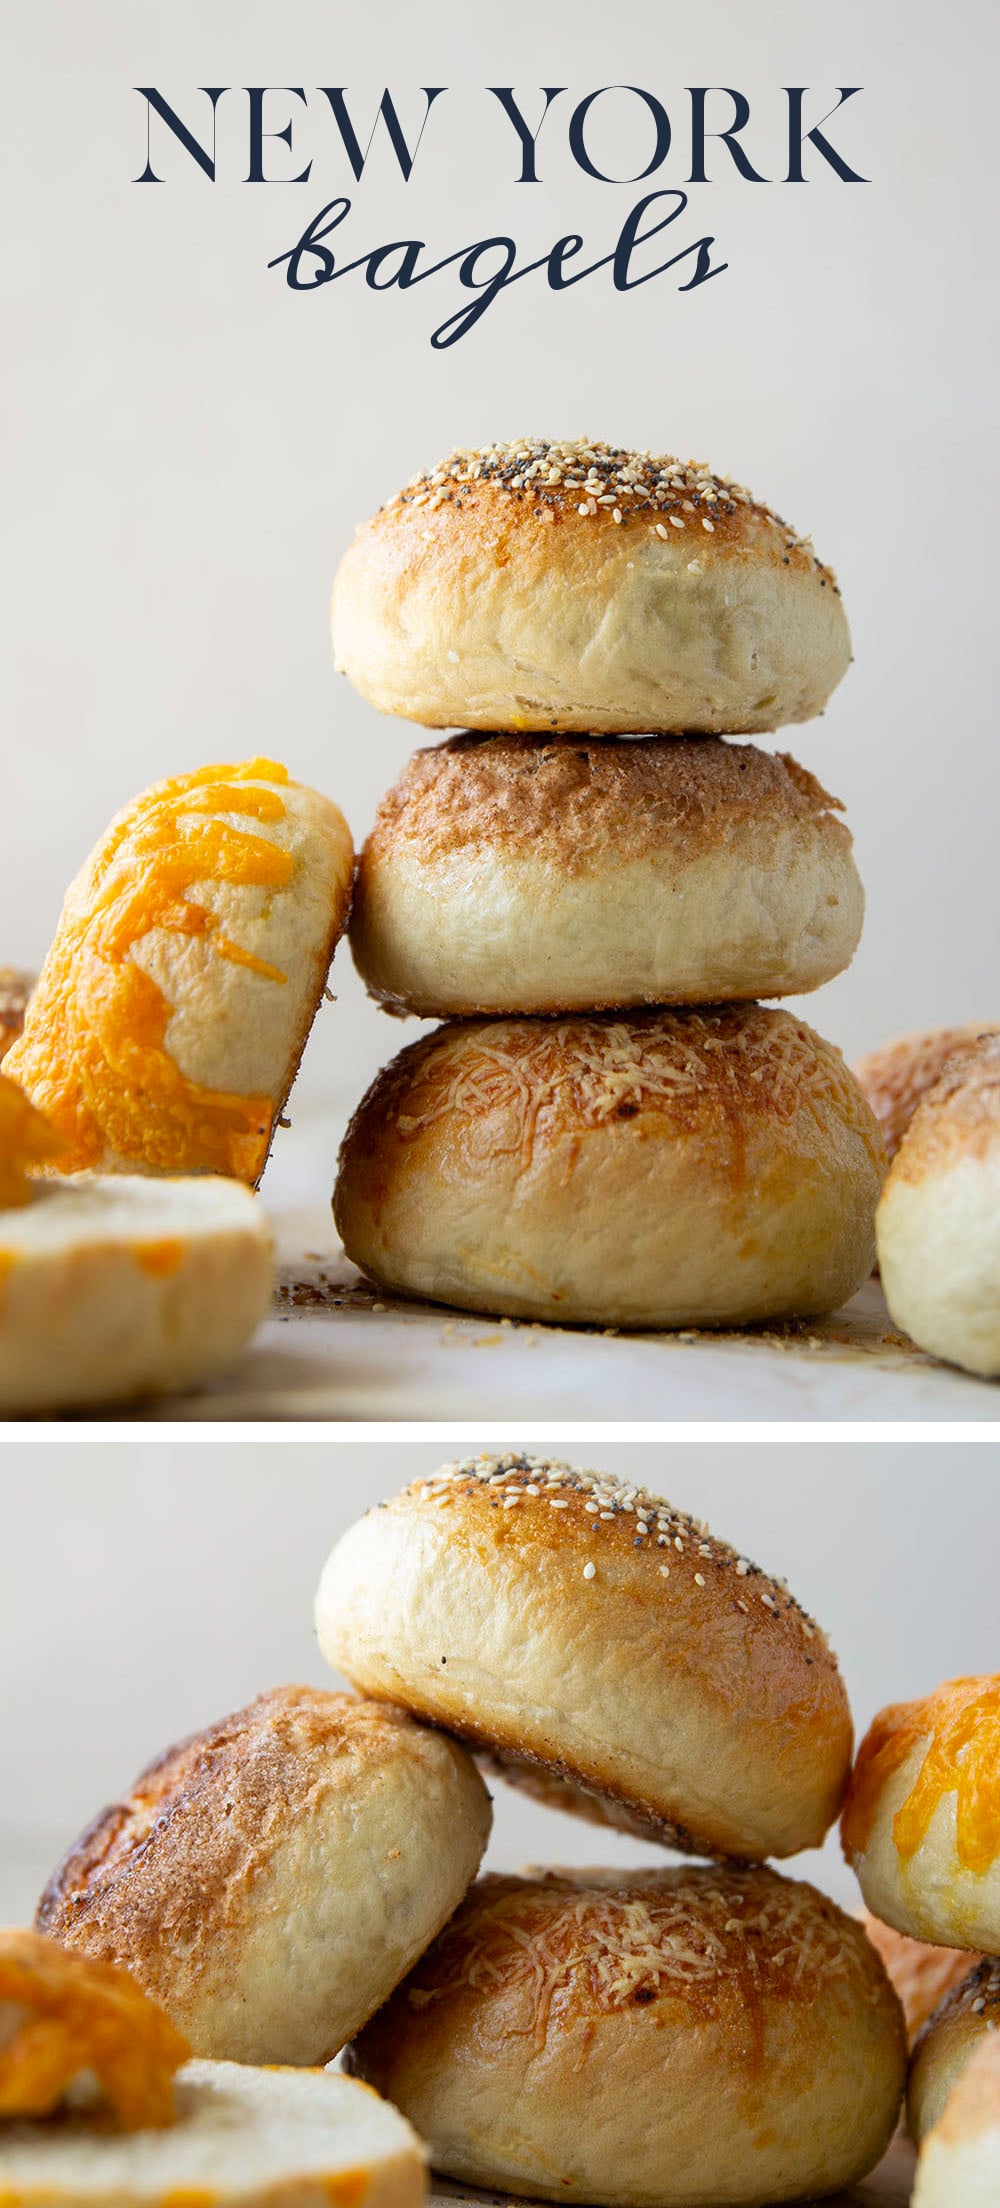
You’ll never make a deli bagel run again once you try these homemade bagels. This easy recipe has the perfect ratio of soft to chewy and are a blank canvas for any bagel flavor you can dream up!
BAGELS. Homemade deli-style bagels for everyone!!
This recipe is a long time coming and no joke, I’ve been meaning to update it for about 6 months now. I’ve made roughly about 12+ batches of these bagels and the obsession is real.
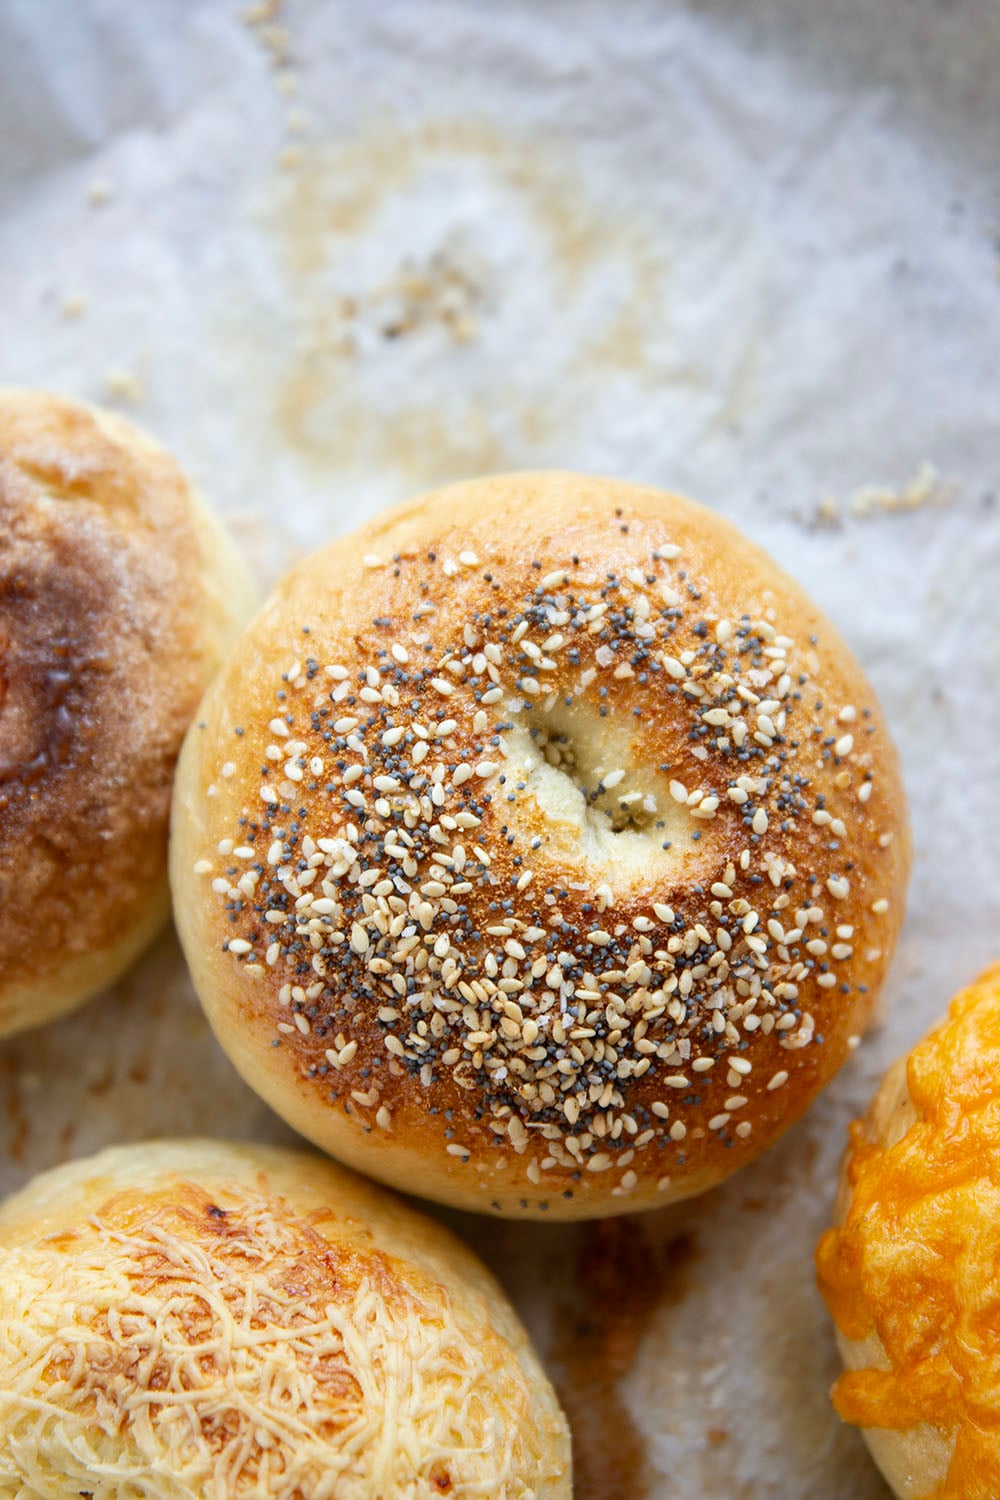
Let’s discuss texture: They’re insanely soft, perfectly sturdy, and they have that unmistakable chewy-crisp texture that we all know and love about bagels.
This results in a bagel that toasts up MARVELOUSLY and serves as the perfect base recipe for any bagel masterpiece you can dream up. Really, these are just perfection and definitely one of those baked goods that any baker needs to cross off their bucket list!
My current obsession? Seeing how many different bagel flavors I can come up with and trust me, this is no minor feat. I’ve made so many different flavors the past few months but I’m always open to suggestions if you’ve got ’em!
These Homemade Bagels Feature…
- A deli-style soft and chewy texture
- An easy recipe that comes together with only 5 basic ingredients
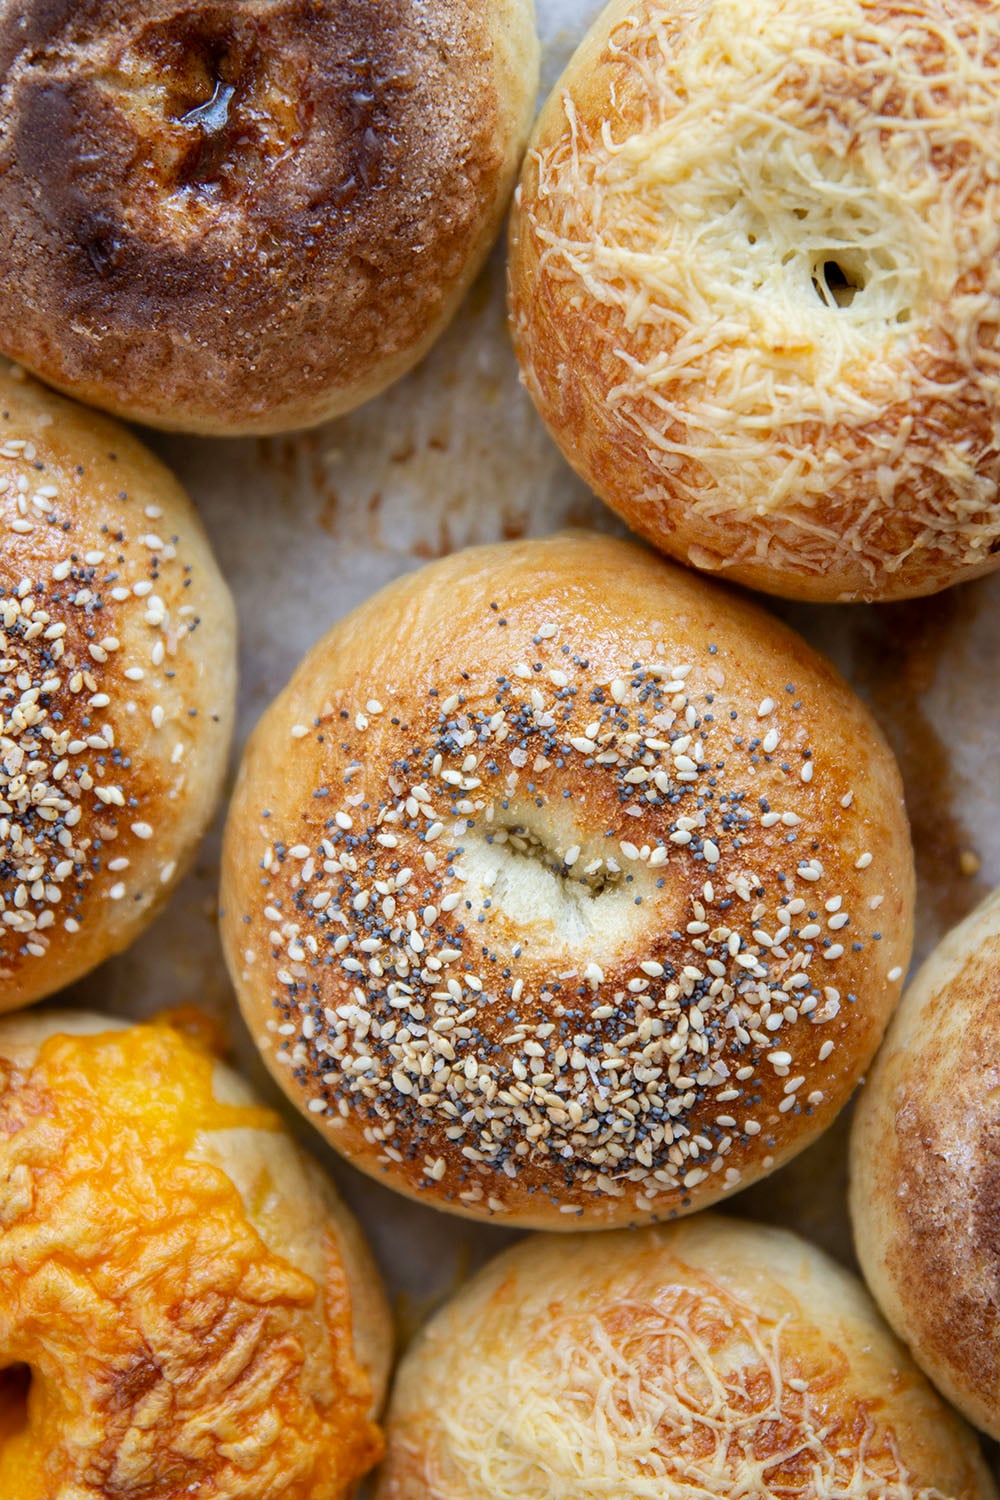
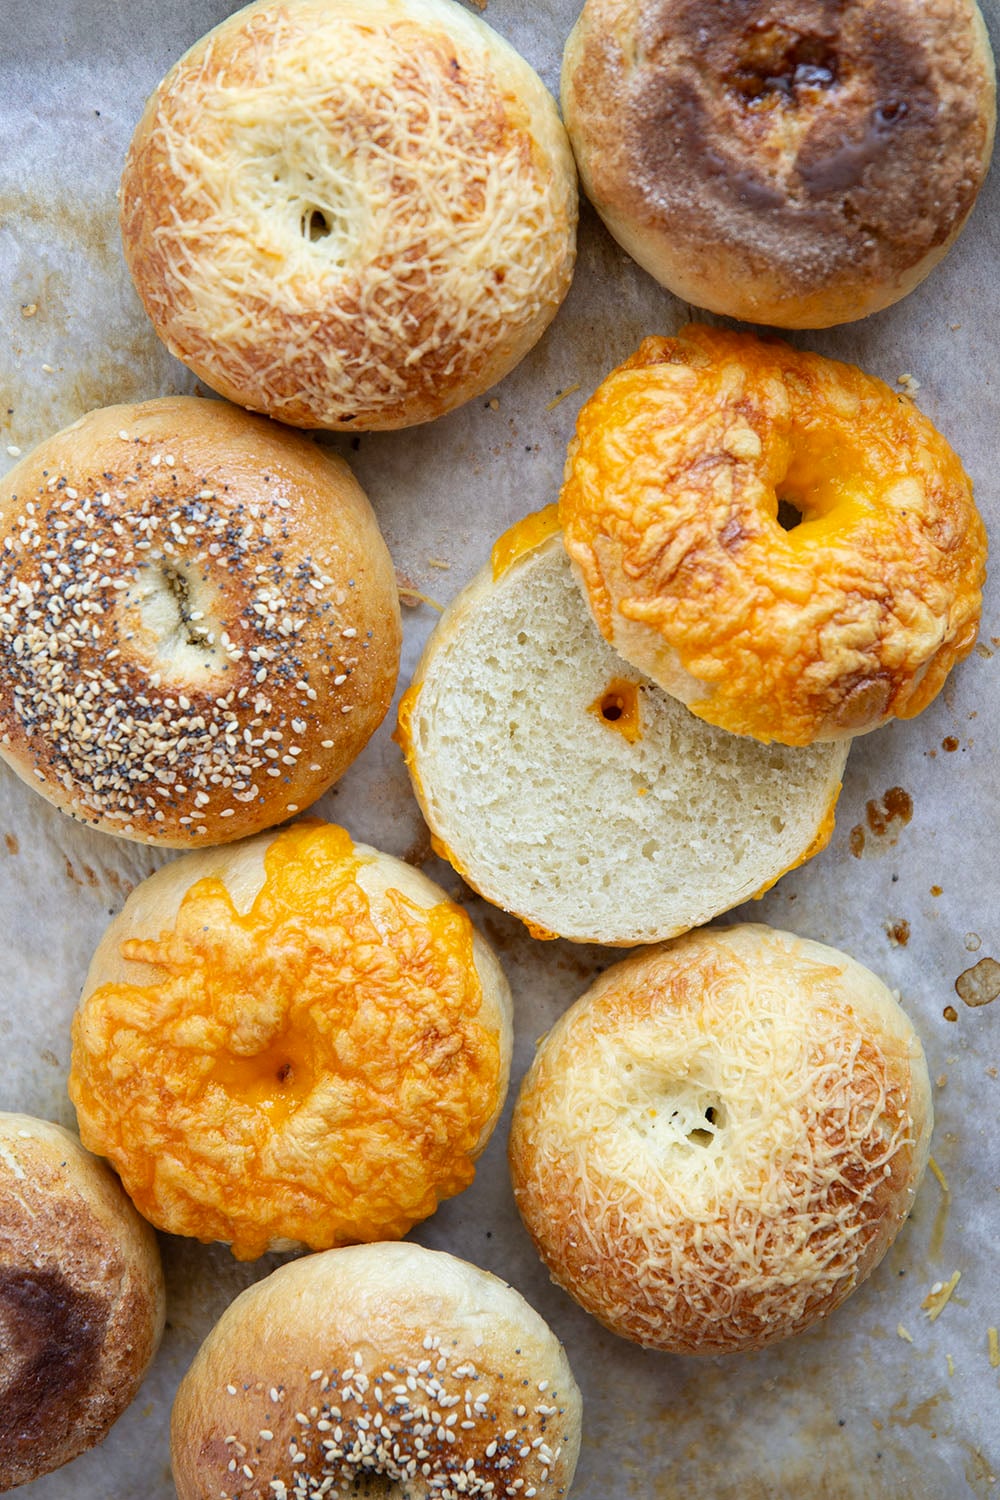
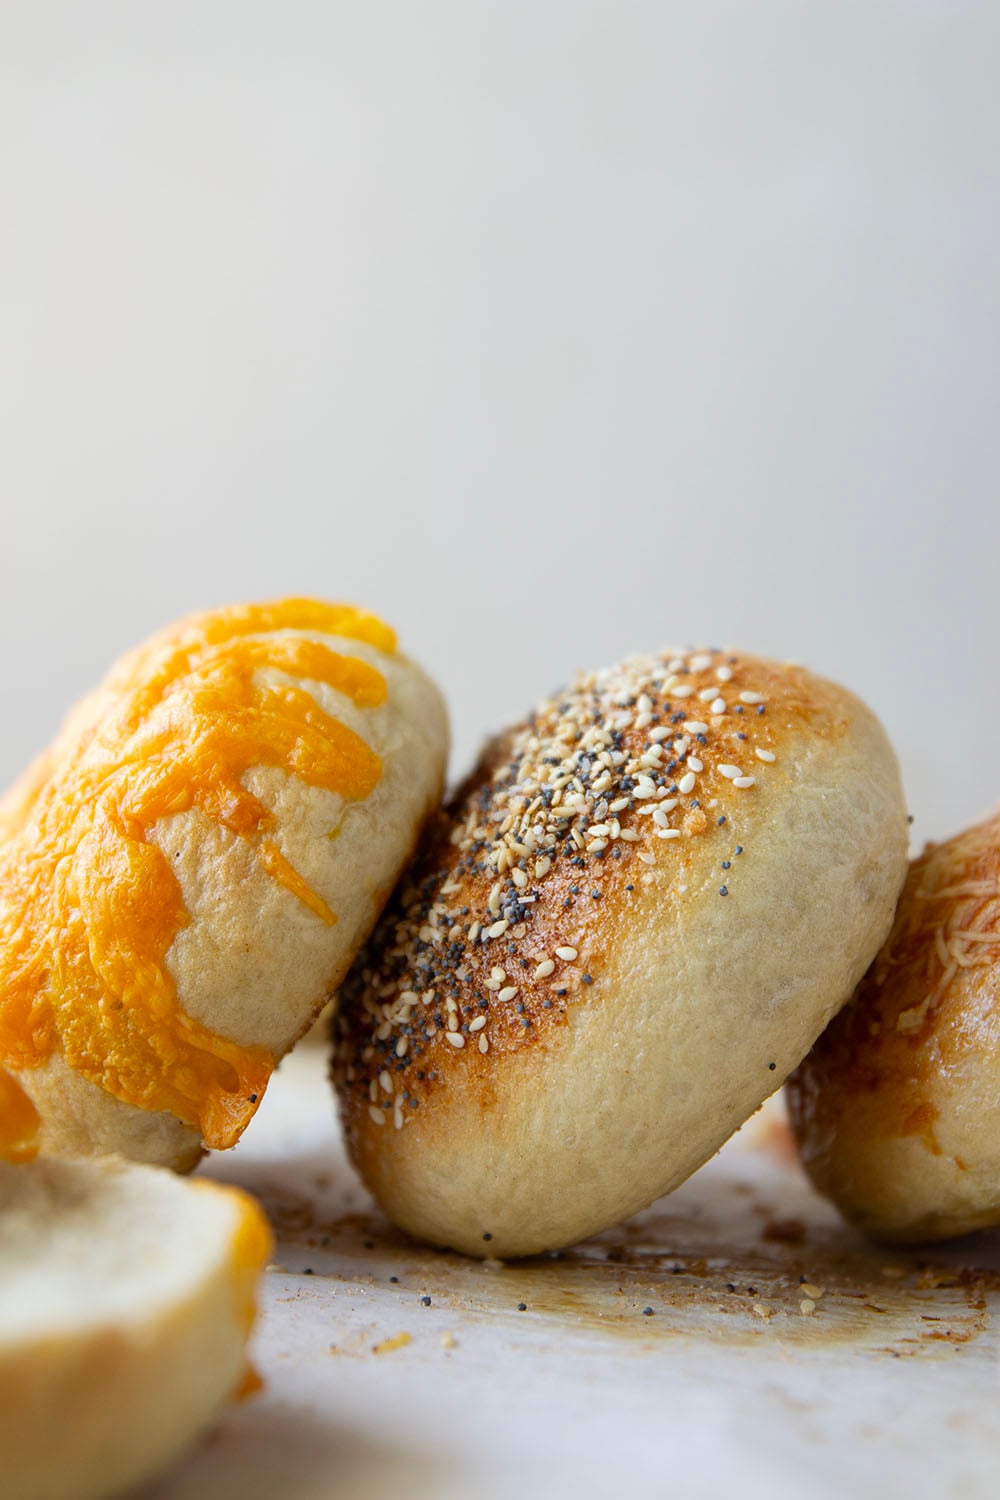
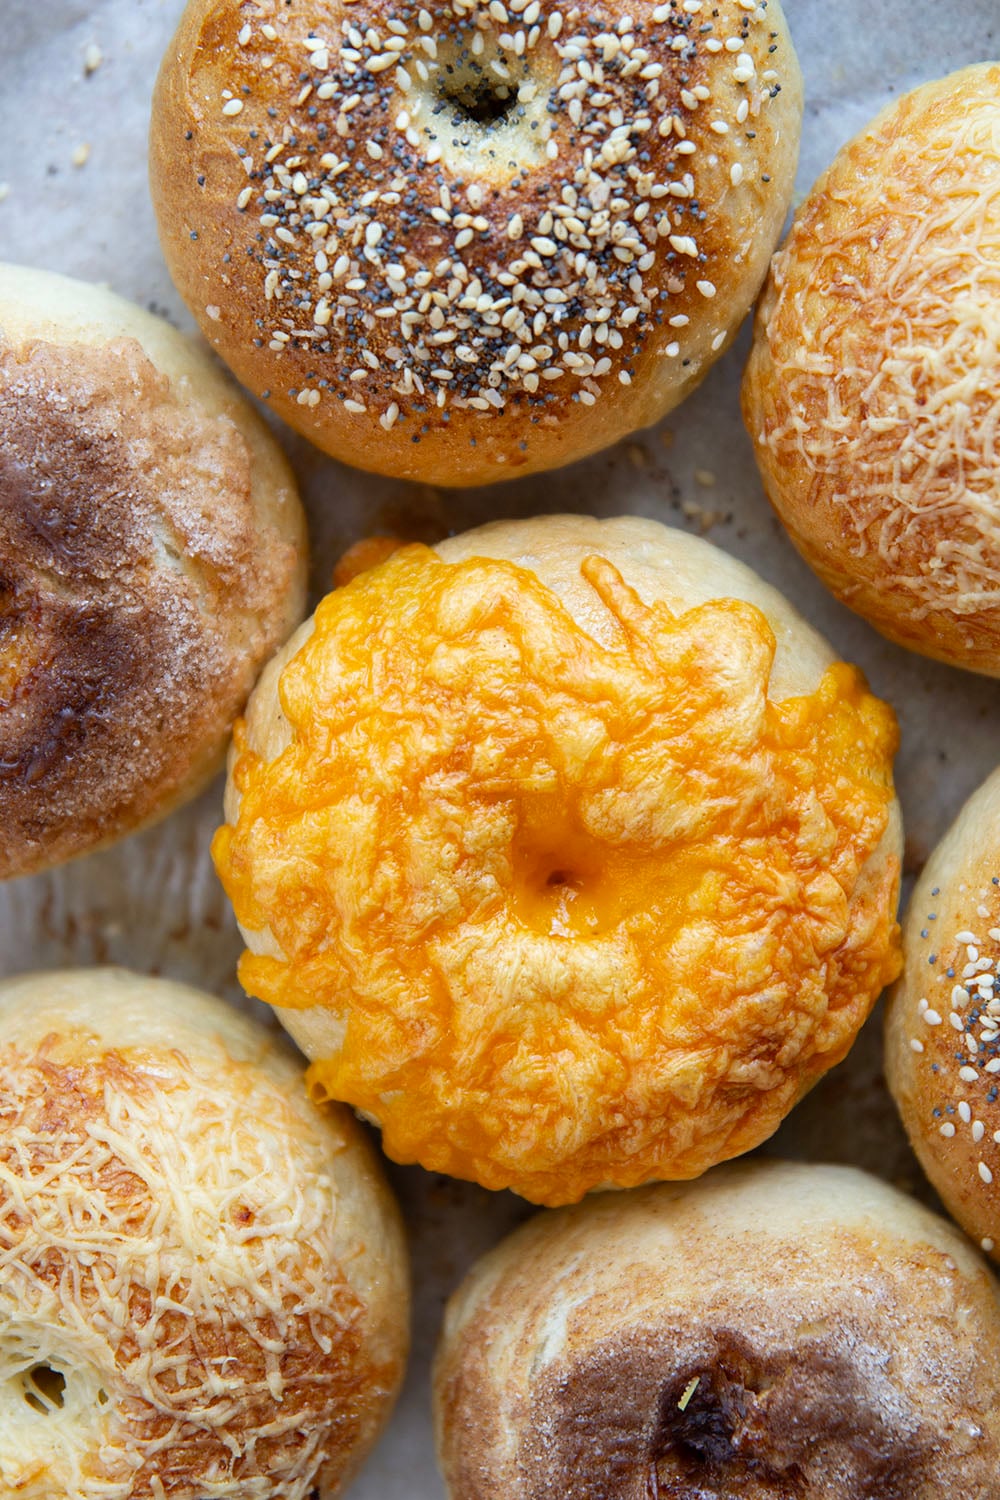
- A blank canvas for many different bagel flavors and toppings
Making the Bagels
(scroll down to the bottom of the post for the full recipe)
Ingredients You Will Need
- Warm water
- Active dry yeast
- Brown sugar
- Kosher salt
- Bread flour
- Egg white
Stand Mixer vs. Hand Mixing
Both a stand mixer and a mixing bowl + wooden spoon will work for mixing this bread. Obviously, by hand requires a little more elbow grease and arm power, but it will still work!
Stand Mixer: make sure you use the dough hook for mixing and let the machine knead the dough on medium speed 4-6 minutes until the dough is stretchy and elastic.
Hand Mixing: use a large bowl and a wooden spoon for mixing the dough. For kneading, turn the dough onto a floured surface and knead about 10 minutes or whenever the dough is stretchy and elastic.
Tips for Perfect Bagels
- Use water that is 110F – I recommend temping the water to ensure it’s not over 110F. If you use liquid that is too warm, it will kill the yeast and your dough will not rise.
- Measure flour correctly – For the highest level of precise measuring, weigh the flour in grams. If you don’t own a kitchen scale, use the spoon-and-level technique for measuring flour as this will prevent over-measuring. Use a spoon to scoop flour into the measuring cup, then level with the back of a knife.
- Knead dough properly – this step is where you will develop the gluten in the dough which is crucial for forming the structure of the rolls. You can knead by hand or use your stand mixer with the dough hook attachment.
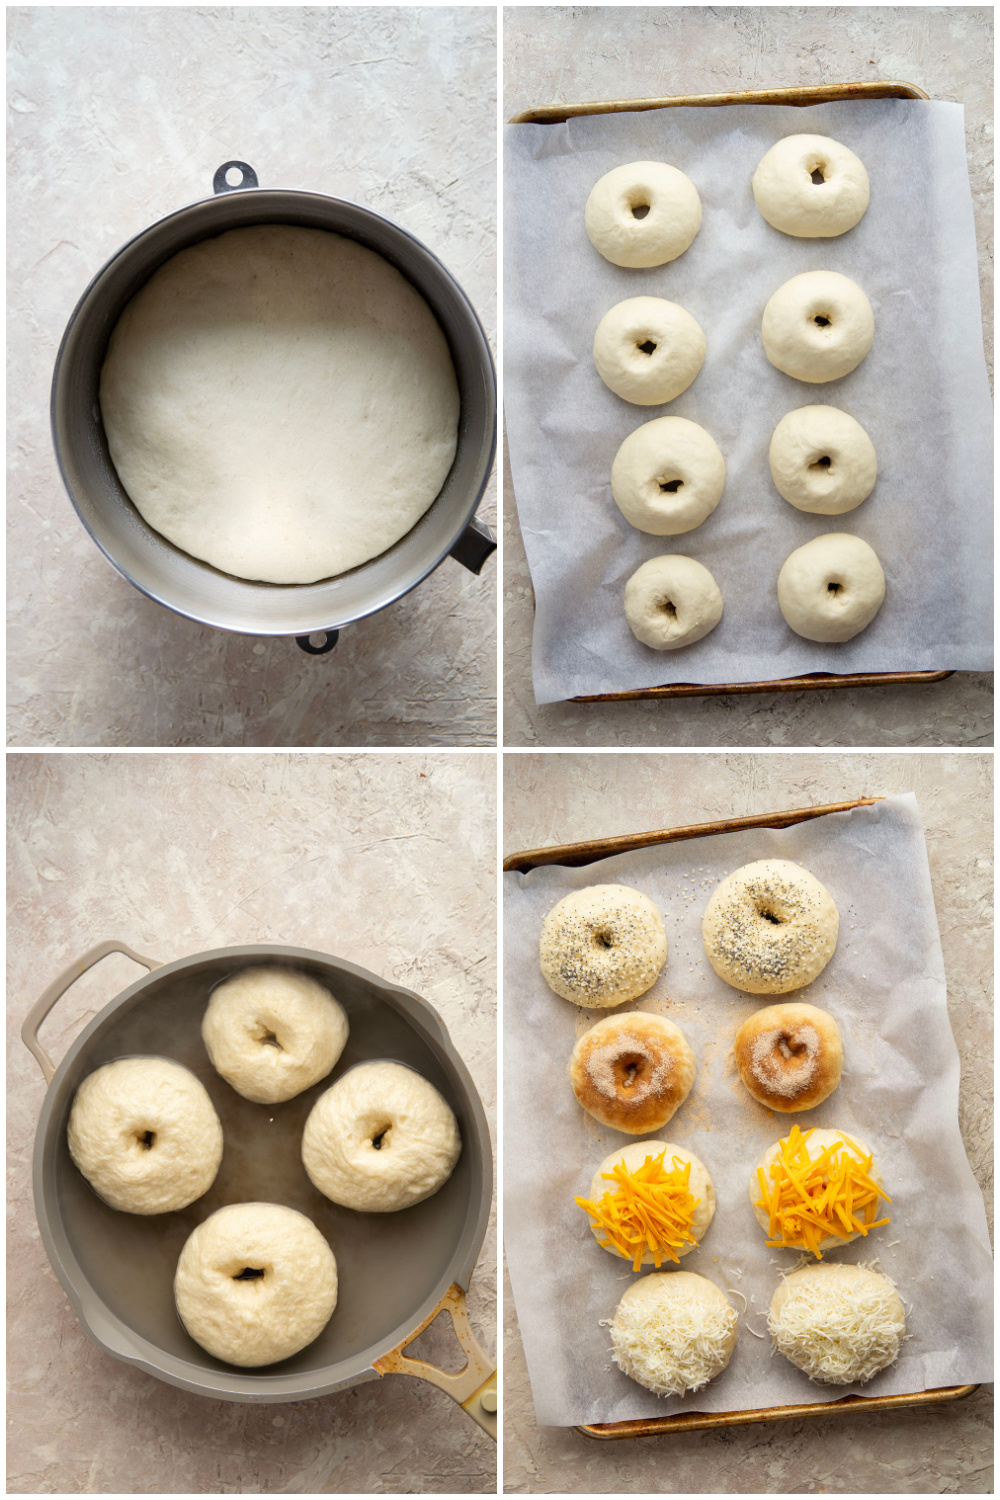
- Allow dough to rise until doubled – turn the dough into a clean greased bowl, cover with plastic wrap, and allow to rise until doubled in size, about 1 to 1-1/2 hours. Once shaped, the dough will require a second rise for about 20 minutes until the dough is just slightly puffy.
- Let dough rise in a warm place – yeast dough loves warm environments for rising. I recommend 75F-80F for a rising environment in your kitchen.
- Divide risen dough into equal portions – I like the size that 8 bagels gives you for this recipe but you can easily make bigger bagels for a batch of 6 or smaller bagels for a batch of 10. Whatever size you choose, make sure that each portion is equal in size for even baking.
- Boil bagels 1 minute – a quick boil of 30 seconds on each side will give these bagels that signature golden, chewy crust on the outside.
- Brush bagels with egg white before baking – the egg white helps promote browning during baking and will help whatever toppings you choose stick to the bagels.
- Bake bagels at 425F – this high temp will give the bagels a crispy, golden exterior and a perfectly chewy inside.
Recipe Variations
Try these ideas for a different twist on these bagels.
- Add a mix-in – after the first rise, try kneading 1/2 cup finely-chopped sun-dried tomatoes, roasted red peppers, kalamata olives, or caramelized onions into the dough for a flavored bagel.
- Get creative with the cream cheese – try a flavored cream cheese such as smoked salmon, scallion, blueberry, strawberry, or jalapeno.
Storing and Freezing Bagels
These bagels store well in an airtight container at room temperature up to 2 days. For best results, I recommend splitting and toasting bagels and topping with cream cheese for serving. They also make a fantastic base for a breakfast sandwich.
To freeze bagels, allow to cool completely, wrap well, and freeze up to 2 months. If possible, I always recommend freezing bagels on the same day you baked them to preserve their freshness. Defrost frozen bagels on the counter (or in the microwave on high for 30-60 seconds) and toast for serving.
I’ll be the first to say you should always support your local bakery, but these bagels make that SO difficult, ya know? I’ve been having one of these for breakfast at least 2x a week the past 6 months and the obsession doesn’t seem to be slowing down.
So now I must know: which bagel flavor are YOU trying first??
Save this recipe using the ‘save to recipe box’ button below. If you make it, please let us know! Leave a comment + star rating below, or take a photo and tag it on Instagram with #wholeandheavenlyoven.
More yeast baking projects to try next!

Homemade Bagels
This recipe may included paid links. As an Amazon Associate, I earn a commission from qualifying purchases.
Ingredients
- 1-1/3 cups (297g) warm water (110F)
- 1 tablespoon (10g) active dry yeast
- 1-1/2 tablespoons (23g) packed light brown sugar
- 1-3/4 teaspoons (12g) kosher salt
- 3-1/2 cups (500g) bread flour spooned and leveled if not weighing
- 1 large egg white, lightly beaten
- Optional toppings: grated asiago cheese, cheddar, everything seasoning, or cinnamon sugar
Instructions
- Pour warm water in the bowl of a stand mixer fitted with a dough hook OR a regular mixing bowl and dissolve yeast in water. Allow to stand for 10 minutes until foamy.
- Mix brown sugar, salt, and flour into water mixture mixing on low speed or with a wooden spoon until dough forms a smooth ball.
- If making bagels in stand mixer, knead bread on medium speed 4-6 minutes until dough is stretchy and elastic. If making dough by hand, turn dough out onto a very lightly floured surface and knead well for 8-10 minutes until dough is stretchy and elastic. Form dough into a smooth ball.
- Grease a large bowl and place dough ball in bowl, turning once to grease top. Cover bowl with plastic wrap and allow to rise at room temperature 1 to 1-1/2 hours until dough is doubled in size.
- Line a large sheet pan with parchment paper. Punch risen dough down and turn onto a clean surface. Use a benchscraper to divide dough into 8 equal pieces and use the heel of your hand to roll each dough portion into a smooth ball. Place dough balls 2 inches apart on prepared sheet pan and cover with a kitchen towel. Allow dough to rise an additional 20 minutes until slightly puffy in size.
- Preheat oven to 425F. Bring a medium pot of water to a boil then reduce heat slightly to hold at a simmer. Use your two index fingers to poke a hole in each dough ball and working in two batches, place half of bagels in simmering water. Allow to cook for 30 seconds on first side, then gently flip to opposite side and cook an additional 30 seconds. Use a kitchen spider or a slotted spatula to remove bagels from water and repeat boiling with remaining bagels. Arrange bagels 2 inches apart on same sheet pan.
- Brush bagels well with egg white and top with desired bagel toppings. Bake bagels at 425F 15-20 minutes until bagels are golden brown. Allow bagels to cool on a wire cooling rack. Toast bagels for serving and enjoy!
Notes
Nutrition
This post was updated with new recipe adjustments and photos on 4/17/26.


Erin @ Miss Scrambled Egg says
These look so tasty! I’ve never made homemade bagels, but I really need to now. The smell of them cooking in the oven would send my family overboard. What a lovely treat. 😀
Sarah says
Thanks Erin! And yes, the smell that fills your house while these bagels bake is pretty much unbelievable. 😀
Manali @ CookWithManali says
the bagels look perfect Sarah! I need to try them asap!!
Sarah says
These are definitely up your alley, Manali! I hope you try them. 🙂
Mary Frances says
I just need a carb loaded week. A bakers dozen of these would just be perfection right now!
Sarah says
Ugh, right?! Bring on all the carbs 24/7. 😉
Jess @ Flying on Jess Fuel says
I’ve been DYING to try making my own bagels! Since they’re one of my all time fave foods. I miss living in the northeast because I miss good bagels!! LOL! I definitely need to try soon, yours look so perfectly chewy!
Sarah says
You TOTALLY need to give these bagels a try, Jess! You will fall head-over-heels in love! 😉
Amber @ Dessert Now, Dinner Later! says
When I worked in a bakery, the bagels were so hard to resist fresh from the oven! These look so soft and delicious!
Sarah says
Gahh there is just no self-control in sight around freshly-baked bagels, right?! 🙂
Devika bhoyar says
Hello,
These bagels look so yummy,
I will definitely try this in the weekend.
Great Article.
Devika bhoyar says
Hello,
These bagels look so yummy,
and am sure my kiddos will surely love this.
Great Recipe.
Rosie says
Do you mean boil for 30 seconds on each side, not 30 minutes for the first side? ☺️
Sarah says
So sorry!! You are definitely correct, it is 30 seconds haha!
Hope says
Can you add baking soda or malt barley syrup to the boiling water as I’ve seen in most other bagel recipes?
Sarah says
You definitely can! I personally prefer boiling these bagels in just water, but you can definitely experiment with different boiling ingredients for a more specific flavor.
Julia Morrison-Pekrul says
I made these today and they turned out FANTASTIC! If there was a way to post a picture, I’d totally share it!
Sarah says
Hi Julia! Feel free to share a photo on Instagram or Facebook and tag my account! I would love to see the final result. 🙂