

Super crispy and baked in minutes in the oven, these crispy oven chicken tenders are quick to prepare and always a hit!
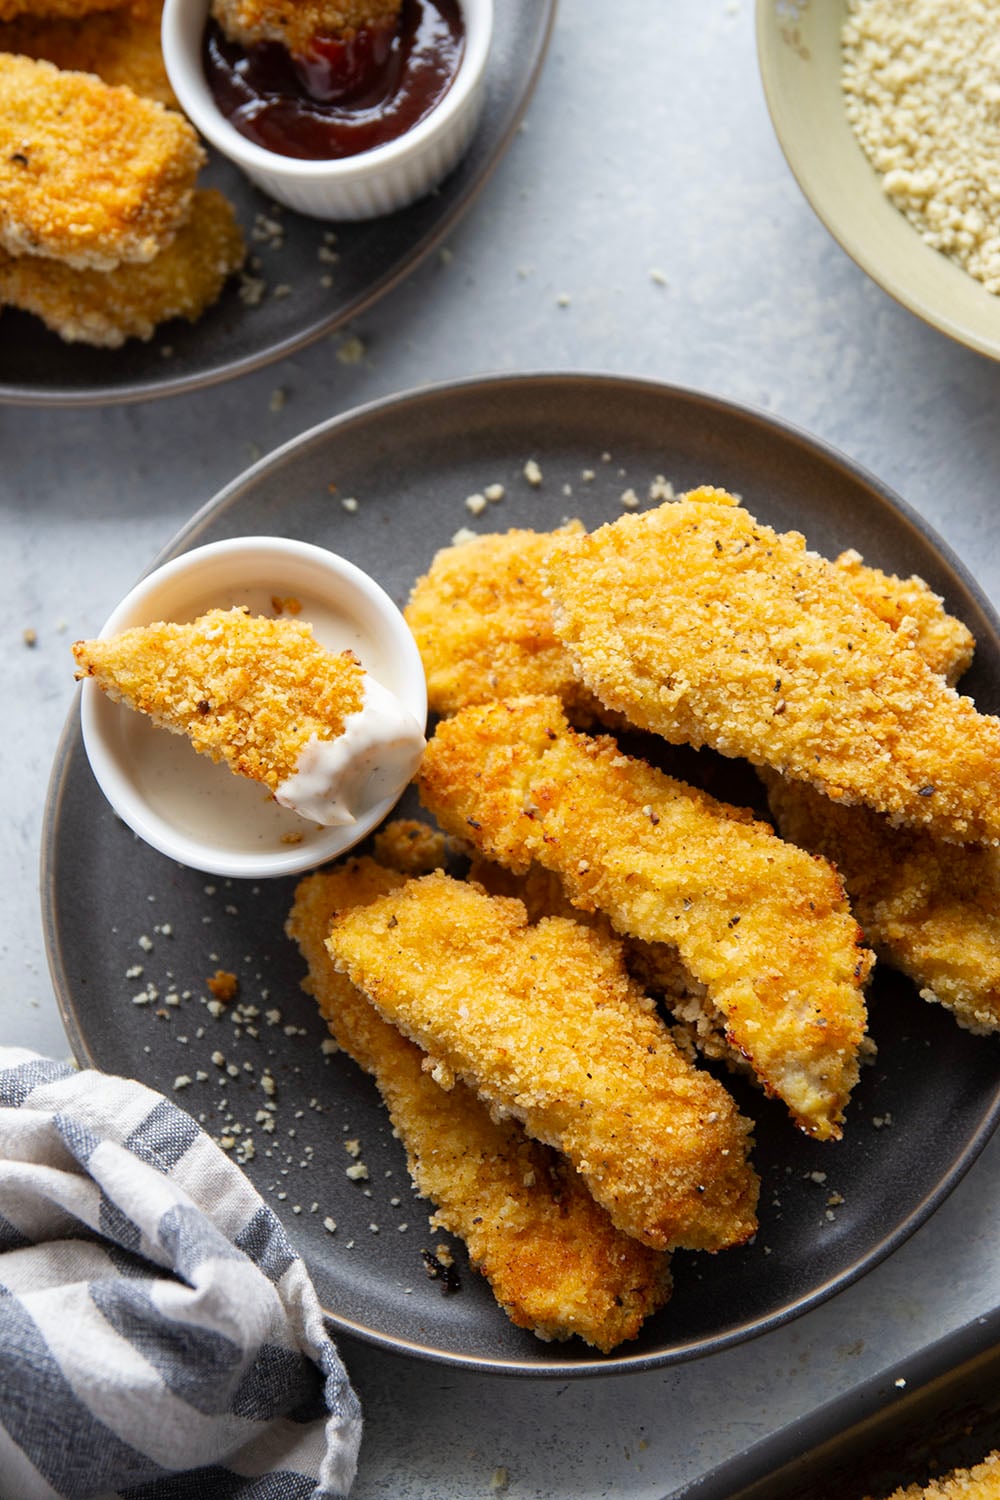
You can kiss that fast food fix goodbye, we’ve got a new and improved chicken tender in town! Just as crispy as their deep-fried cousins and somehow even better despite the fact.
Yep, these beauties cook up entirely in the oven and you would absolutely never guess it. I’ve been perfecting this recipe for years and I can confidently say that this recipe is just as good as deep-fried.
Bang-up job, oven-fried chicken. You have me completely fooled over here and loving every moment of it.

Only a few simple ingredients and a few easy techniques stand between you and this crispy goodness! These chicken tenders are totally weeknight friendly and super fun to serve with a variety of sauces for dipping as well.
Just be aware, once you start dipping you won’t be stopping any time soon.
These Chicken Tenders feature…
- A perfectly crispy breaded exterior and juicy inside
- Fried completely in the oven for a healthier alternative to deep-fried
- An easy recipe that comes together in minutes and great served with a variety of dipping sauces

Making the Chicken Tenders
(scroll down to the bottom of the post for the full recipe)
Ingredients You Will Need
- Egg
- 2% or skim milk
- All-purpose flour
- Yellow cornmeal
- Panko breadcrumbs
- Spices
- Chicken tenders
- Unsalted butter
Choosing Your Chicken
For this recipe you will need either pre-cut chicken tenders or boneless skinless chicken breasts cut into tenders.
I generally opt to cut my own tenders out of breasts since breasts are a little less expensive at the grocery store. Use a sharp knife to cut breasts into roughly about 2×6-inch tenders.

Tips for Perfect Chicken Tenders
- Use standard breading procedure – this means coating the tenders in flour, beaten egg, and then rolling in the breadcrumbs. This method will help your breading stick to the chicken.
- Preheat pan and melt butter – place butter on sheet pan and place in the oven to preheat for about 2-4 minutes. Preheating the pan with a layer of melted butter before adding the chicken will help them brown.
- Bake tenders at 425F – this high temperature will help the exterior of the tenders crisp up nicely.
- Flip tenders halfway through cooking – this helps both sides of the tenders crispy up evenly.
Recipe Variations
Try these ideas for a different twist on these tenders.
- Add cheese to coating – toss 1/4 cup grated Parmesan or asiago to the panko coating.
- Make them spicy – add cayenne pepper to the panko coating to taste for a spicy chicken tender.
- Serve with different sauces – try ranch, barbecue, buffalo, or honey mustard.
Reheating Chicken Tenders
These chicken tenders reheat very easily if you plan to store leftovers or meal prep! Oven bake them at 400F 10-15 minutes or air fry at 375F 8-10 minutes.

I mean, that golden crispy coating just doesn’t lie, folks! These chicken tenders almost put the deep-fried version to shame with how perfectly they fry up in the oven.
These are a forever-on-the-menu kinda deal around here and you’re about to find out why!
Save this recipe using the ‘save to recipe box’ button below. If you make it, please let us know! Leave a comment + star rating below, or take a photo and tag it on Instagram with #wholeandheavenlyoven.

More chicken tenders you need in your life!

Crispy Oven Chicken Tenders
This recipe may included paid links. As an Amazon Associate, I earn a commission from qualifying purchases.
Ingredients
- 1 large egg
- 1/4 cup 2% or skim milk
- 1/4 cup all-purpose flour
- 2 tablespoons yellow cornmeal
- Salt and pepper to taste
- 1-1/2 cups panko breadcrumbs
- 1 teaspoon garlic powder
- 1 teaspoon onion powder
- 1/2 teaspoon smoked or regular paprika
- 2 lbs chicken tenders (or 2 lbs boneless skinless chicken breasts cut into 2-inch tenders)
- 4 tablespoons unsalted butter
- Dipping sauces for serving
Instructions
- Preheat oven to 425F. In a shallow bowl, whisk egg and milk together until smooth. Combine flour and cornmeal in a separate shallow bowl and season with salt and pepper. Combine panko, garlic powder, onion powder, and paprika in a third shallow bowl and season with salt and pepper to taste.
- Dredge chicken tenders in flour, shaking off excess. Dip tenders in egg, then roll in panko until fully coated. Place tenders on a plate.
- Arrange tablespoons of butter on a large sheet pan. Place pan in preheated oven and allow pan to warm and butter to melt 2-4 minutes. Use a brush or spatula to spread butter in an even layer. Arrange chicken tenders in a single layer on sheet pan, making sure tenders are not touching each other.
- Bake chicken tenders at 425F 8 minutes, flip tenders to opposite side, and continue baking an additional 8-10 minutes until tenders are crispy and register 165F. Serve tenders warm with desired dipping sauces and enjoy!
Notes
Nutrition
This post was updated with new recipe adjustments and photos on 1/8/26.


Mel says
While I liked what little coating was left on the chicken, the butter boiled in the oven and boiled off most of the breeding leaving me with greasy wet chicken instead of the crispy fried chicken described in the recipe. I will try again but will skip the melted butter in the pan, instead dipping the chicken in melted butter instead of milk.
carol Hawley says
this recipe sounds amazing, a must try for sure because we hate anything deep fried THANKS
Kelly says
What’s the carb count. Nutritional info
Shelly says
Thanks for the recipe – this was a keeper! I really liked the idea of using cornmeal – would not have thought of it. I made a few changes- used Italian flavored breadcrumbs in place of the Panko, dipped the chicken in egg instead of milk, and baked the pieces in olive oil instead of butter. Result was delicious. Served it with vegetable fried rice for a meal, and heated up a few leftover chicken pieces in the toaster oven next day for a wholesome snack dipped in honey mustard dressing. I’m thinking of tweaking this recipe to make oven fried fish; went out to dinner the other night and ordered fish and chips, and it was so greasy I couldn’t even enjoy it.
Sarah says
So glad to hear you enjoyed, Shelly! Thanks for sharing your recipe adjustments. 🙂