

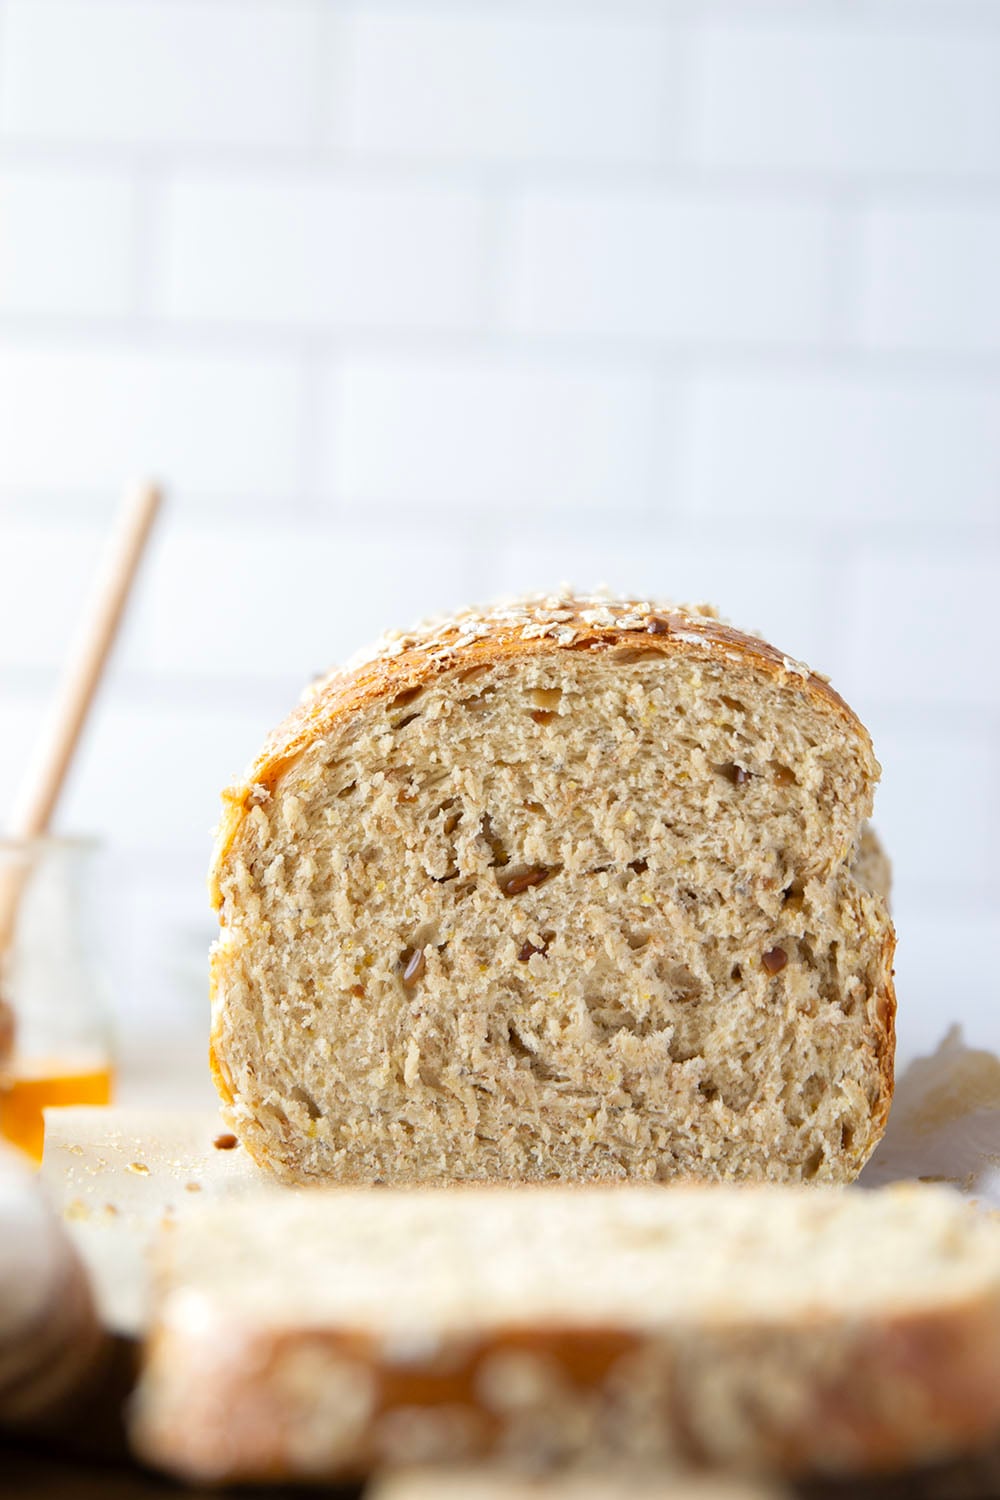
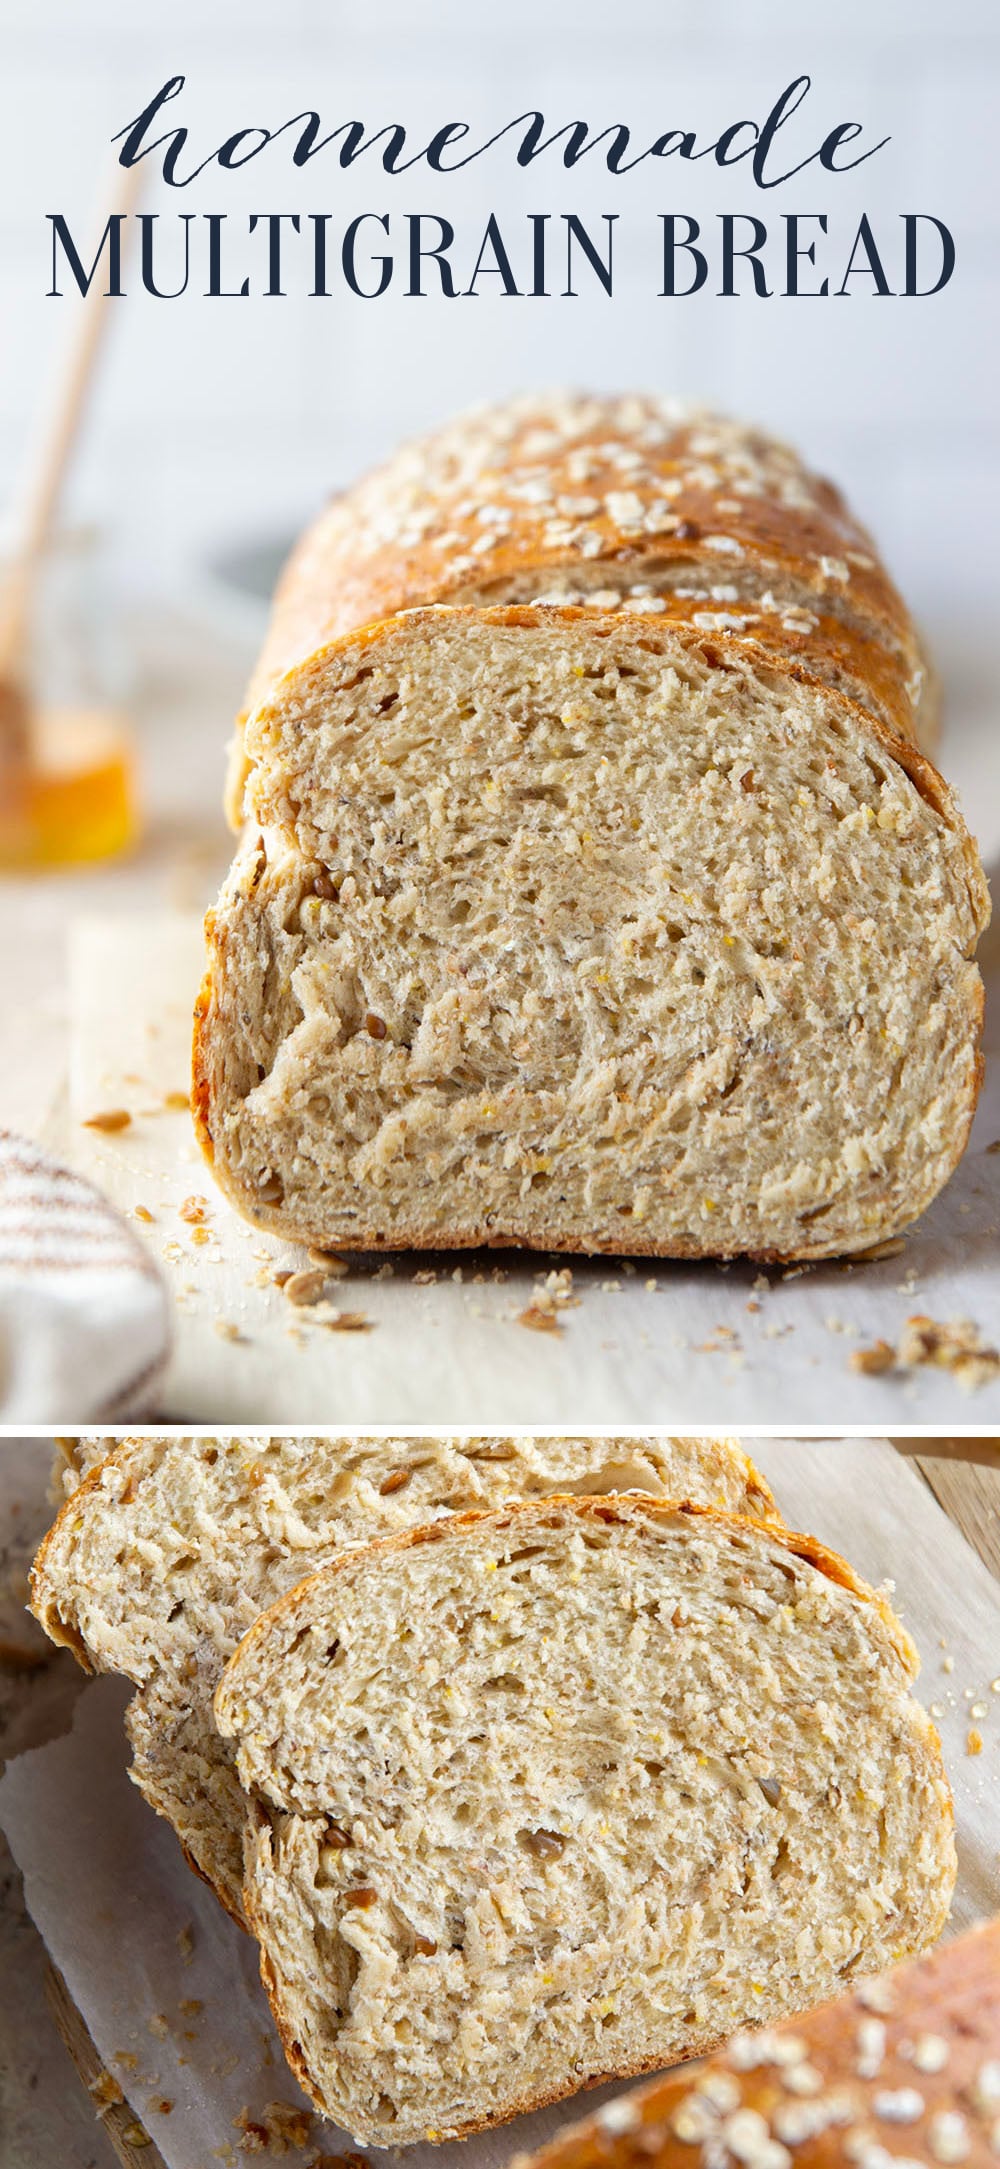
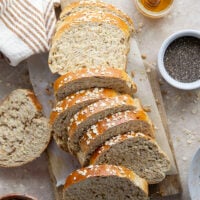
This homemade multigrain bread is packed with all kinds of hearty grains and incredibly soft in texture at the same time! Ideal for toast, sandwiches, or pairing alongside soup for dipping.

Your regular lunch sandwich is getting a major transformation today with pretty much the BEST sandwich bread in all the land.
Multigrain bread is no longer something you need to shell out big $$ for at your local co-op or health-food grocery store. This bread is a fraction of the cost, makes two big loaves, and you definitely don’t need to be a professional baker to nail it.
And oh gosh, the texture alone is convincing me to ditch the storebought bread altogether. If you’re a fan of lots of texture and hearty ingredients in your bread, this is definitely the recipe for you!

I can’t even count all the different ways I’ve been enjoying slices of this bread lately. From avocado toast to a soup dipper to just a simple lunch sandwich, it’s definitely been making the rounds.
Trust me, this is a bread bandwagon you’re gonna want to hop on.
This Bread features…
- A perfectly soft and fluffy texture
- Hearty grains including a 10-grain hot cereal mix, oats, sunflower seeds, and chia seeds
- An easy dough that can be made both in a stand mixer or by hand
Making the Bread
(scroll down to the bottom of the post for the full recipe)
Ingredients You Will Need
- Hot cereal mix
- Boiling water
- 2% or skim milk
- Active dry yeast
- Vegetable oil
- Honey
- Egg
- Kosher salt
- Sunflower seeds
- Chia seeds
- Whole wheat flour
- All-purpose flour
- Oats
Stand Mixer vs. Mixing Bowl
Both a stand mixer and a mixing bowl + wooden spoon will work for mixing this bread. Obviously, by hand requires a little more elbow grease and arm power, but it will definitely work.
If you choose to go the stand mixer route, make sure you use the dough hook for mixing and let the machine knead the dough on medium speed 5-7 minutes until the dough is stretchy and elastic.
If you are making the dough by hand, use a large bowl and a wooden spoon for mixing the dough. For kneading, turn the dough onto a floured surface and knead about 10 minutes or whenever the dough is stretchy and elastic.

Tips for Perfect Multigrain Bread
- Soften cereal – pour boiling water over the hot cereal mix to soften and allow to sit about 30 minutes until the mixture is cooled down to 110F.
- Heat milk to 110F degrees – I recommend temping the milk to ensure it’s not over 110F. If you use liquid that is too warm, it will kill the yeast and your dough will not rise.
- Measure flour correctly – I use the spoon-and-level technique for measuring flour as this will prevent over-measuring your flour. Use a spoon to scoop flour into the measuring cup, then level with the back of a knife. For the highest level of precise measuring, weigh the flour in grams.
- Knead dough properly – this step is where you will develop the gluten in the dough which is crucial for forming the structure of the rolls. You can knead by hand or use your stand mixer with the dough hook attachment.
- Allow dough to rise until doubled – turn the dough into a clean greased bowl, cover with plastic wrap, and allow to rise until doubled in size, about 1 to 1-1/2 hours. Once shaped, the dough will require a second rise for about 30 minutes until the dough is just slightly puffy.
- Let dough rise in a warm place – yeast dough loves warm environments for rising. I recommend 75F-80F for a rising environment in your kitchen.
- Roll dough out – punch the dough down and divide into two even portions. Roll each portion out into a 9×12 rectangle, tightly roll up into a cylinder, tuck ends underneath, and place in 9×5 loaf pans. This rolling step is a little tip for getting extra bread height.
- Brush loaves with egg wash – this helps the loaves brown nicely while they bake.
- Bake bread at 375F – the bread will be a deep golden brown and should register 190F on a kitchen thermometer when it’s done. I recommend using a kitchen thermometer for this part.
Ways to Enjoy Bread
- Sandwiches
- Toasted
- Served alongside a soup for dipping
- Fresh with butter, jam, or a drizzle of honey
Storing and Freezing Bread
This bread stores well in an airtight container at room temperature up to 4 days. For best results, reheat or toast individual slices for serving.
To freeze bread, allow to cool completely, wrap well, and freeze up to 2 months. Defrost bread on the counter and reheat for serving.

Your carb life is definitely about to be changed for the better! It’s insane how soft this bread is inside yet every bite is packed with fantastic whole grains that contribute so much amazing texture.
Boring sandwiches? We don’t know them anymore.
Save this recipe using the ‘save to recipe box’ button below. If you make it, please let us know! Leave a comment + star rating below, or take a photo and tag it on Instagram with #wholeandheavenlyoven.
More yeast bread baking projects!
Homemade Multigrain Bread
This recipe may included paid links. As an Amazon Associate, I earn a commission from qualifying purchases.
Ingredients
- 1 cup (160 g) 10-grain hot cereal mix
- 2 cups (428 g) boiling water
- 1/2 cup (120 g) warm 2% or skim milk (110F)
- 2-1/4 teaspoons (8 g) active dry yeast
- 1/4 cup (44 g) vegetable oil
- 1/3 cup (100 g) honey
- 1 large (46 g) egg, lightly beaten
- 2 teaspoons (10 g) kosher salt
- 1/2 cup (70 g) unsalted roasted sunflower seeds
- 1 tablespoon (11 g) chia seeds
- 1/2 cup (70 g) whole wheat flour (spooned and leveled)
- 6 cups (750 g) all-purpose flour (spooned and leveled)
- 1 large egg white, mixed with 1 tablespoon water
- Oats for topping
Instructions
- Place cereal mix in a medium heat-safe bowl. Pour boiling water over top and gently stir. Let stand at room temperature until mixture reaches 110F, about 30 minutes.
- Place warm milk in the bowl of a stand mixer fitted with a dough hook OR a large bowl. Dissolve yeast in milk and let stand 5 minutes until foamy.
- Mix cooled cereal-water mixture, vegetable oil, honey, and egg into yeast mixture until smooth. Add salt, sunflower seeds, chia seeds, whole wheat flour, and all-purpose flour to bowl and mix on low speed OR with a wooden spoon if making dough by hand until dough pulls away from sides of bowl, about 2 minutes of mixing (dough will be smooth and ball-shaped)
- If making dough in stand mixer, knead dough in mixer on low speed 5-7 minutes until dough is stretchy and elastic. If making dough by hand, turn dough onto a lightly floured surface and knead by hand until dough is stretchy and elastic, about 10 minutes of kneading.
- Place dough in a greased bowl, turning once to grease top. Cover bowl with plastic wrap and let rise in a warm place at room temperature 1 to 1-1/2 hours until dough is doubled in size.
- Once dough has doubled in size, preheat oven to 375F. Line two 9×5 loaf pans with parchment paper OR lightly grease. Set aside.
- Punch risen dough down and turn onto a floured surface. Divide dough in half and roll each half out into a 9×12 inch rectangle. Tightly roll each rectangle starting at the short side, pinching ends to seal. Transfer each loaf to prepared pans, tucking ends under.
- Brush each loaf with egg white/water mixture and sprinkle with oats. Cover pans with plastic wrap and allow loaves to rise in a warm place at room temperature 30-45 minutes until doubled in size.
- Bake loaves at 375F 20-25 minutes until bread is a deep golden brown and registers 190F on a kitchen thermometer.
- Cool bread completely in pans on a wire cooling rack. Once cooled, remove from pans and use a serrated knife to cut into slices. Enjoy!
Notes
Nutrition
This post was updated with new recipe adjustments and photos on 1/22/26.


Joanne says
All those grains are definitely an incentive to get bread baking! I love loaves where they’re all mixed in, so they’re chewy and crunchy and fluffy in all the right places. This is that bread.
Sarah says
Bread with all-of-the-above thrown inside is definitely a winner! 😉 Thanks Joanne!
Gayle @ Pumpkin 'N Spice says
This bread looks fantastic, Sarah! I love the multigrain flavor and texture going on here. So perfect to toast up with some coffee. Yum!
Sarah says
Thanks so much Gayle! xoxoo
Jen @ Baked by an Introvert says
This bread looks scrumptious, Sarah. I love homemade bread so much better than store bought. I must begin bread baking asap!
Sarah says
Nothing beats homemade bread that’s for sure! 😉 Thanks Jen!
Jessica @ Jessica in the Kitchen says
This bread looks so delicious!! Love love love homemade bread. Happy New Year Sarah!
Sarah says
Thank you Jessica! Happy New Year!
Jess @ whatjessicabakednext says
Multi-grain bread is definitely my favourite! I certainly will be making some very soon! Bet it makes delicious sandwiches to pack up for lunch too. 😀
Sarah says
It definitely makes the best-ever lunch sandwiches! 😉 Thanks Jessica!
Manali @ CookWithManali says
What a beautiful looking bread Sarah! Pinned and yes I agree with you…that feeling after you make your own bread is super awesome. You feel like a chef! 😀
Sarah says
Thanks Manali! Nothing beats the feeling of making your own bread! 🙂
Jessica C says
I have a quick question. I made this bread and the 4.5 cups flour was just way too much when I made it. I didn’t even use about 3/4 of a cup of it… I think that it may be due to me leaving the cereal, warm water, yeast and honey for too long. It seemed that the cereal swelled a lot more and the liquid was decreased quite a bit. Have you had that happen or do you think that might be my problem? Have you ever had a similar problem? Its rising right now and I will update you on how it turns out for me. 🙂
Sarah says
Hi Jessica! Yes, it sounds to me like you let the cereal soak in the water too long and it decreased as a result. How did the loaf turn out in the end?
Annie @Maebells says
Gorgeous!!! Your making me miss gluten so much!! 🙁
Sarah says
Thanks Annie!!
Mary Frances says
This is the dream sandwich bread! First of all, homemade bread = the bomb always. Second of all, the seed combo sounds amazing!
Sarah says
It definitely makes my idea of a dreamy-sandwich! 🙂 Thanks Mary Frances!!
Rachael | Spache the Spatula says
This bread looks beyond fantastic! I’m also so totally about texture in my bread, and this looks like perfection!
Sarah says
Thanks Rachael! Texture-y bread for the WIN! 🙂
Ashley | The Recipe Rebel says
I love making my own yeast breads, but mine are never as perfect as this one is. Totally jealous! My long-weekend days are long gone, and replaced by home-with-2-kids-every-day-and-trying-to-maintain-some-sanity kind of days. So EVERY day is a coffee and carbs kind of day!
Sarah says
Haha! Coffee and carbs. Where would the world be without ’em? 😉
Kathy @ Olives & Garlic says
I’ve been waiting to check out this post ever since I saw you post pics on IG yesterday. 🙂 This bread will be perfect for my daughters school lunch, since I make her lots of sandwiches.
Sarah says
Yea! I hope you’ll let me know how your daughter likes this bread, Kathy! 🙂
Danielle says
I’m kind of obsessed with this bread! I can never find a bread at the store that doesn’t have a million ingredients I can’t pronounce. Problem solved! I really need to get into making my own, because this looks perfect!
Sarah says
I have the same problem, Danielle! Solution? Homemade bread! 🙂
ashley says
Looks yummy! What is cracked wheat cereal though… cream of wheat?
Sarah says
Hi Ashley! This is the brand I used. Cream of wheat wouldn’t work in this particular recipe.
Sherri@The Well Floured Kitchen says
Oh my – This bread is gorgeous! Love the addition of chia seeds! The bread seems to be bursting with healthy goodness. Yum!
Sarah says
Thanks so much Sherri! 🙂
Kelly - Life Made Sweeter says
This bread looks absolutely gorgeous, Sarah! Homemade bread is my weakness and I love all the yummy grains you packed into these. My family would polish off two of these loaves in a flash!
Sarah says
Thanks so much Kelly! xoxoxo 😀
Jess @ Flying on Jess Fuel says
Wow, this bread looks perfect!! I always find homemade bread to be FAR off from the texture of store bought… but this looks SO light and fluffy!! 🙂
Sarah says
I agree, Jess! It’s so hard to make homemade bread have that texture of store-bought!