Super easy homemade marshmallows that are flavored with honey and do not contain corn syrup! These marshmallows are as soft as clouds and taste even better than store-bought.

Look no further for your next cooking project! Homemade marshmallows are in the house and your s’mores game may never be the same.
At first glance making marshmallows homemade may seem like a bit of a wasted effort, but hear me out! These fluffy little gems are so worth it.
Just to give you an idea how good these are I’m gonna let you know that I’m typically a marshmallow hater but it turns out I’m actually just a storebought marshmallow hater. I could not get enough of these.

These marshmallows only have a few steps to them but I walk you through each and every one with pictures to follow along as well! You’ll be nailing these every time you make them which, trust me, is gonna be pretty often.
These Marshmallows feature…
- A soft and fluffy texture
- A delicate vanilla and honey flavor
- Only minutes to prep with simple ingredients

Making the Marshmallows
(scroll down to the bottom of the post for the full recipe)
Ingredients You Will Need
- Powdered sugar
- Gelatin
- Water
- Granulated sugar
- Honey
- Kosher salt
- Vanilla extract
Photo Tutorial
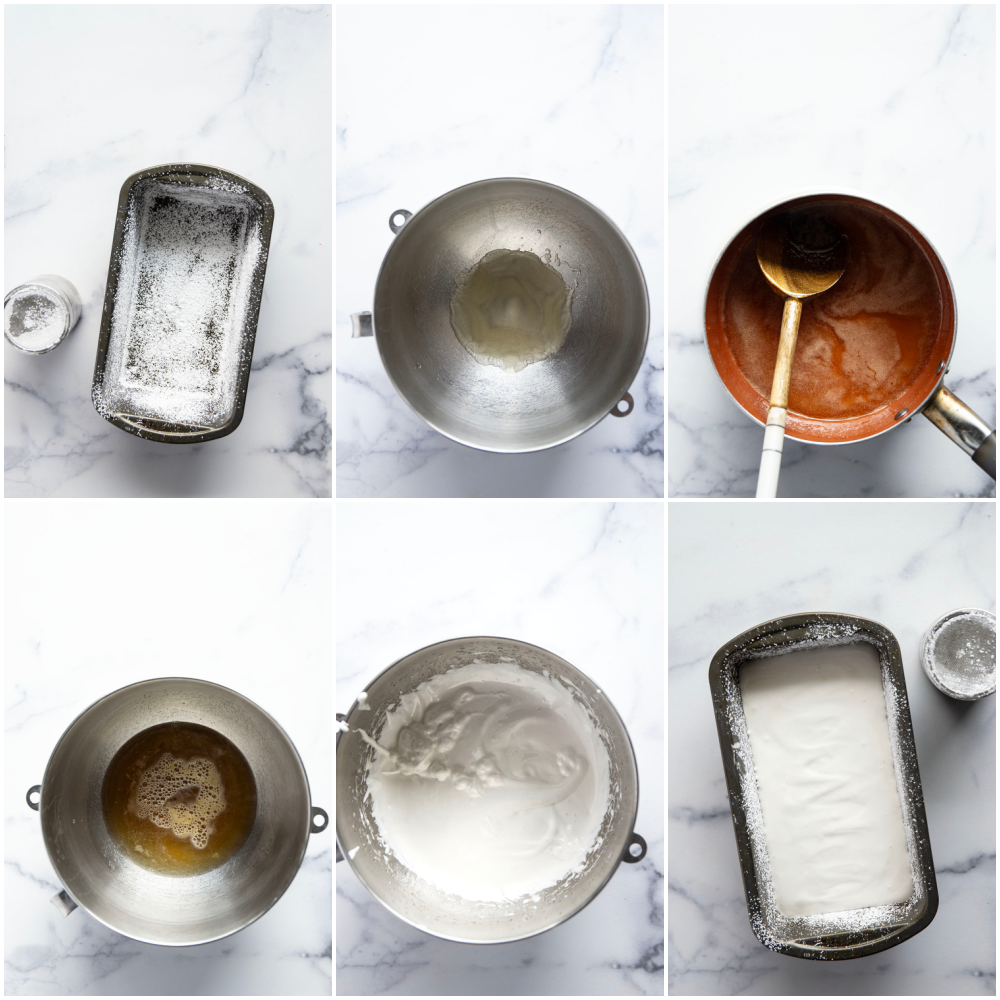
Follow the photo tutorial below for step-by-step guidance.

Tips for Perfect Marshmallows
- Do not make on a humid day – the marshmallows will suck up the moisture in the air and not set up properly. For best results make marshmallows when the weather is dry.
- Grease pan and dust with powdered sugar – this will help the marshmallows lift out the pan later.
- Bloom the gelatin – this softens the gelatin and ensures that it will dissolve easily into the other ingredients.
- Heat honey syrup to 240F – I recommend using a candy thermometer for this step.
- Use a stand mixer – you will need a stand mixer with the whip attachment for these marshmallows.
- Beat marshmallows 8-10 minutes – the mixture will start off looking liquidy and brown but within a few minutes should turn white and fluffy. The marshmallows are done when you can pull the mixture up with the whip attachment and it maintains a ribbon shape when you flop it back into the bowl.
- Spread marshmallows in pan immediately – the marshmallows will start to set up pretty quickly so its important you immediately spread it in the pan.
- Allow marshmallows to set 6 hours – I even prefer an overnight set time to give the marshmallows plenty of time to set up.
- Clean knife between cuts – this will make for clean cuts.
- Roll marshmallows in powdered sugar – once the marshmallows are cut, roll them in additional powdered sugar to give them that signature marshmallow texture.
How to Use Marshmallows
- As a brownie topper
- In s’mores
- In hot cocoa
- All on their own!

However you choose to enjoy these marshmallows I can guarantee they’ll be a hit for everyone! The fluffy texture just melts in your mouth and they’ve got vanilla + honey flavors complimenting each other so well.
Just know that you’ve pretty much ruined storebought marshmallows for yourself forever.
Save this recipe using the ‘save to recipe box’ button below. If you make it, please let us know! Leave a comment + star rating below, or take a photo and tag it on Instagram with #wholeandheavenlyoven.

Try these other sweet treats next!
Homemade Marshmallows
This recipe may included paid links. As an Amazon Associate, I earn a commission from qualifying purchases.
Ingredients
- Powdered sugar for dusting
- 2 teaspoons unflavored gelatin
- 1/2 cup water, divided
- 3/4 cup granulated sugar
- 1/2 cup honey
- 1/4 teaspoon kosher salt
- 1 teaspoon vanilla extract
Instructions
- Lightly butter and dust a 9×5 inch loaf well with powdered sugar. Set aside.
- In the bowl of a stand mixer dissolve gelatin in 1/4 cup water. Set aside.
- Stir remaining 1/4 cup water, granulated sugar, honey, and salt together in a medium saucepan over medium heat. Heat mixture to 240F, stirring occasionally.
- Very slowly, pour sugar mixture over water-gelatin mixture. Attach a whip attachment to mixer, and beat on high speed 8-10 minutes, or until mixture is thick and creamy. The marshmallows are whipped enough when mixture forms a ribbon in bowl when pulled up with whip attachment. Add vanilla to marshmallow mixture and beat an additional 30 seconds.
- Immediately spread marshmallow mixture evenly into prepared pan (do this part quickly, it will begin to set up) Cover pan with plastic wrap and allow marshmallows to set in refrigerator overnight or 6 hours.
- Dust marshmallows with powdered sugar and cut into 1-inch squares, cleaning knife between cuts, and roll in additional powdered sugar to coat. Store marshmallows in an airtight container in refrigerator up to 2 weeks.
Notes
Nutrition
True story: My 3-year old sister calls these marshmallows, “mush-mellows.” And my younger brother accidentally called them “mushrooms.” I just about died laughing.
This post was updated with new recipe adjustments and photos on 4/17/25.


Leave a Reply